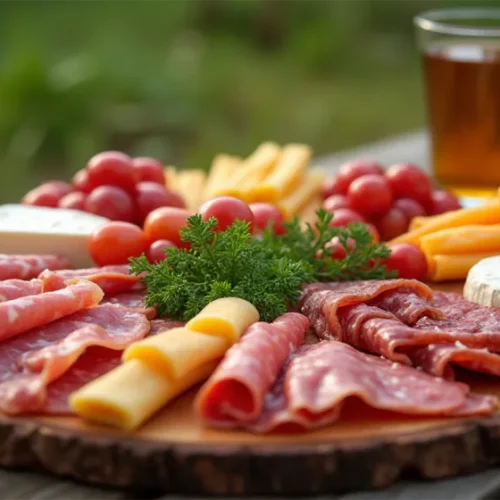
DIY Camping Charcuterie Board with Meats and Cheeses
Create a DIY camping charcuterie board with meats, cheeses, fruits, and nuts for a no-cook gourmet meal under the stars.
Equipment
- Cutting Board or Tray: For arranging the ingredients.
- Small Jars or Bowls: Ideal for dips, olives, nuts, and spreads.
- Cheese Knife or Multi-Tool: To cut meats and cheeses.
- Reusable Containers or Bags: To keep ingredients fresh.
- Cooler with Ice Packs: Maintains freshness for perishable items.
- Napkins and Utensils: For serving and cleanup.
- Reusable Eco-Friendly Tools: Optional for sustainable camping.
Ingredients
Cured Meats
- Salami
- Prosciutto
- Pepperoni
- Soppressata
Cheeses
- Hard Cheeses: Aged cheddar gouda, manchego.
- Soft Cheeses: Brie camembert, goat cheese.
Crackers and Bread
- Whole-grain crackers
- Baguette slices
- Crostini or breadsticks
Fruits and Nuts
- Fresh Fruits: Grapes apple slices, berries, pear slices.
- Dried Fruits: Apricots figs, raisins.
- Nuts: Almonds walnuts, pistachios.
Extras for Variety
- Olives green or black
- Pickles or cornichons
- Small jars of honey or jam
- Dark chocolate squares or truffles
Instructions
Step 1: Prep Ingredients at Home
- Slice cured meats and cheeses for easier serving at the campsite.
- Wash and dry fresh fruits thoroughly.
- Pack crackers and bread in airtight containers to maintain crispness.
Step 2: Assemble the Board at the Campsite
- Lay out your cutting board or serving tray.
- Arrange anchor items (cheeses, small jars, and dips) first.
- Fold or roll cured meats and place them around the cheeses.
- Add crackers and bread beside the cheeses for easy pairing.
- Fill gaps with fruits, nuts, and extras to balance flavors and colors.
Step 3: Enhance Presentation
- Use contrasting colors to create a visually appealing layout.
- Stack and layer crackers or bread for added texture.
- Garnish with fresh herbs or edible flowers for a final touch.